3-Ingredient Classic Sponge Cake
This is the simplest sponge cake recipe, very fluffy, tender and actually melts in your mouth. I've been making it for many years and the cakes made with this batter have always been a great success at the festive table. You can spread any favorite cream on it, add fruit, cocoa or anything else. There is only one simple condition for the success of this sponge cake recipe: using a mixer.
One more tip: you can make the sponge cake in advance. It keeps very well for three or four days, wrapped in foil or frozen, even for three or four months.
Prepare the ingredients. You can replace three tablespoons of flour with cornstarch, so the cake will be even lighter. It's optional.

Separate the egg whites from the yolks.

Pour half of the amount of sugar (100g) over the yolks.

Whip the egg whites until white. When the foam starts to harden, gradually add the remaining sugar (100g).
Beat well until stiff peaks - if you turn the bowl upside down, it won't fall.

Combine the yolks with 100g of sugar. Mix well until they turn into white foam and increase three times in volume.

Spoon one third of the whipped egg whites into the yolks mixture. Stir carefully with slow, up and down movements.

Add flour to this mixture. With slow movements again, carefully incorporate everything in. If you want to use cocoa or walnuts, hazelnuts, raisins - add them to the flour first, which is, then, stirred into the yolk mixture.

Add the remaining meringue to the batter. Fold it in very carefully, from top to bottom - not in any case with circular movements.

This is what the final mixture should look like.

Line a pan (26-28cm) with parchment. Don't line or grease the sides.

Pour the batter into the pan, smooth out carefully.
Bake in the oven for about thirty minutes at 180 degrees C, until golden brown. Careful! Don't open the oven during the first fifteen minutes of baking.

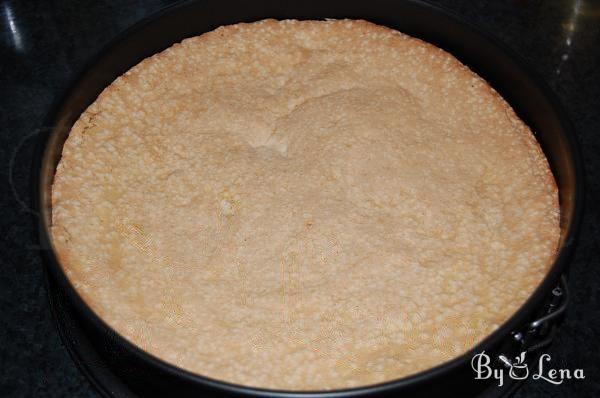
Don't get scared if the cake rises a lot in the oven and then falls back. This is an indicator that it's done and you can take it out.
Allow to cool completely after baking.

After it has cooled, remove from the tray and let sit for at least eight hours (or let sit in the pan for eight hours). This is the optimal time after which the sponge cake is ready to be decorated and turned into a cake. It's now when it absorbs the cream best and is easier and nicer cut into layers.
According to each one's skill, cut into two or three layers. I use a serrated bread knife, it's perfect here. Watch the video to see the movements and the method.
It's ideal to bake the cake in the evening and decorate the next day.

I noticed that a cake which was baked in a 26cm pan is best if cut into three layers. In the 28cm one, the cake will be lower and the layers will be thinner. It's even better, but you also need the skill to cut them nicely.
I often cut the cake in only two layers and it's very good, so it's all up to you.
Anyway, it's a very fluffy, soft and light sponge cake. Every single time the cakes made with this batter have been a success, and I've been making it for more than eight years.
Enjoy!

